


This guide provides a step by step walkthrough of ripping audiophile vinyl to 24/192 digital audio on the Mac. The vinyl recording software applications used in this quick start guide are Pure Vinyl ![]() , Amarra Vinyl
, Amarra Vinyl ![]() , and Vinyl Studio
, and Vinyl Studio ![]() .
.
Going into detail for each software application would result in a small book. Instead, the approach taken is to walkthrough the basic steps of ripping both sides of an LP record, splitting the tracks, and rendering the output for high resolution playback.
The audiophile pressing I chose is the impeccable Analogue Productions mastering of Cat Steven’s Tea for the Tillerman ![]() .[PRBREAK][/PRBREAK]
.[PRBREAK][/PRBREAK]

The record packaging contains a two-page fold out that goes into detail on how the original master tapes were found, in excellent condition, and the processes used for this pressing.


A true work of art in every way captured in 1970. This brand new record was played three times, once for each vinyl recording application.
In the Guide to Converting Analog Vinyl to Digital Files Using Windows ![]() , I am using Pro-Ject Audio’s Expression Classic
, I am using Pro-Ject Audio’s Expression Classic ![]() , with a Pro-Ject carbon fiber tonearm, and factory fitted Sumiko Blue Point No. 2 cartridge
, with a Pro-Ject carbon fiber tonearm, and factory fitted Sumiko Blue Point No. 2 cartridge ![]() , Pro-Ject Tube Box S
, Pro-Ject Tube Box S ![]() , and Lynx Hilo A/D D/A converter
, and Lynx Hilo A/D D/A converter ![]() . It is the same gear for this article with one exception. Pure Vinyl recommends implementing the RIAA equalization
. It is the same gear for this article with one exception. Pure Vinyl recommends implementing the RIAA equalization ![]() curve in software as opposed in hardware (i.e. a phono preamp). Let’s start with Pure Vinyl.
curve in software as opposed in hardware (i.e. a phono preamp). Let’s start with Pure Vinyl.


Pure Vinyl

Pure Vinyl implements the RIAA equalization ![]() curve in software. Rob Robinson’s AES Paper (PDF)
curve in software. Rob Robinson’s AES Paper (PDF) ![]() on the subject is an excellent read.
on the subject is an excellent read.
For this tutorial, Rob supplied me with a TC Electronic Impact Twin ![]() . The output of the Sumiko Blue Point No.2 cartridge is matched to the Twin’s high-Z (instrument) preamps with a custom connector
. The output of the Sumiko Blue Point No.2 cartridge is matched to the Twin’s high-Z (instrument) preamps with a custom connector ![]() that includes load resistance and capacitance.
that includes load resistance and capacitance.

The Twin was connected to the MacBook Pro 13” ![]() , running OS X version 10.8.2, via Firewire, and the Impact Twin software installed. The next step is to open the Audio Setup window in Pure Vinyl:
, running OS X version 10.8.2, via Firewire, and the Impact Twin software installed. The next step is to open the Audio Setup window in Pure Vinyl:

TC Near is the name of the audio device and is set to 24/192.
In the vinyl to digital guide for Windows ![]() , is a section called, “Preflight Hardware Check” that goes over a checklist to ensure the hardware pieces are properly calibrated before beginning recording.
, is a section called, “Preflight Hardware Check” that goes over a checklist to ensure the hardware pieces are properly calibrated before beginning recording.
This is what the Pure Vinyl screen should look like with everything turned on and ready to go:

Note the top meters are showing approximately -83 dB signal to noise ratio. The Pro-Ject table used has unbalanced RCA connectors, so this is typical of an unbalanced connection. For the ultimate s/n ratio, Pure Vinyl recommends a balanced connection ![]() .
.
Clicking on the record spindle will bring up the Record Audio to File dialog box:

There are a couple of key areas that require attention. First is to enter Artist and Album info at the top left.
Next is to set the recording trigger level at the top right. Note the blue background on the meters and how it is set at -80dB. This is the trigger level threshold that can be adjusted with the slider. Make sure it is above the noise floor or it won’t work. When the needled is dropped, the threshold is triggered, and recording starts.
The rest of the settings are default. Note a 24/192 flat recording lossless file is being created.
Clicking on Record brings up The Ready to Record Side 1 dialog:

This is a good time to try a couple of test recordings to ensure proper recording level. If using RIAA equalization in software, Pure Vinyl’s recommendation is to be somewhere around -12 dBFS to -6dBFS. For RIAA equalization implemented in hardware, then closer to -3dBFS is recommended.
Needle drop. Enjoy the music.
Lift needle at end of disk.
Flip the LP, and click the Click When Ready to Continue Recording button.
Needle drop, enjoy the music, and lift again.
At this stage, the Ready to Record dialog indicates that the needle has been lifted and ready to record another side. With both sides recorded, recording is complete.

Click on Stop Recording. Pure Vinyl proceeds to “cut” the vinyl image.

Side 1 is already cut. Side 2 of the vinyl image being cut in the above screen shot.
Once cutting the vinyl image is complete, the vinyl image is ready to play or split the tracks. Clicking on the green Editor button, on the right hand side, will bring up the editor screen:

Click on Add Track and enter in the track name:

Clicking OK adds the track to the track list:

Next move the stylus to the next track. Using the “jog” control, (round small circle at bottom middle of screen), watch the waveform display, (screen shot below), and move between tracks to find the right spot where it is just surface noise. I usually wear headphones at this point to hear better over any room noise. The virtual turntable has added physics to give the table weight and feels like a real turntable - way cool:

Here I have centered on splitting between track 1 and track 2 as can be seen by both the dark groove at 3:55 and the waveform with low surface noise given this is the first spin of the record.
Continue to split tracks, clicking on the spindle for Side 2, then returning to Side 1, now all tracks are split and labeled:

Click Save… and once done, click Render. In the Render Tracks screen below, Preview Output Levels has also been clicked:

Click on Render Tracks:

Pure Vinyl analyzes the recorded audio signal to determine the highest peak on the recording, and adjusts the overall gain, in this case by +5.13 dB to within 0.1dB of 0dBFS.
iTunes Integration: Note that the software can add a iTunes bookmark so that iTunes points to the location of the Pure Vinyl rips so as to not to make duplicate files.
The pressing is so quiet that no editing of clicks, pops or surface noise was required.
How does it sound?
Here is the first 65 seconds of the Pure Vinyl recording of Cat Steven’s, Wild World: Pure Vinyl Wild World 24/192 75MB ![]()
It would be good to compare to a reference. Fortunately, HDTracks has a 24/192 version ![]() of this master that can be used as a direct compare.
of this master that can be used as a direct compare.
Here is the first 65 seconds: HDtracks Wild World 24/192 75MB ![]()
Hear any differences?
The help file is well written, with both a fast track and deep dive approach. A remote tutorial is part of the software license and the support I received from Pure Vinyl was top notch.
There are many other features and details that could be covered about Pure Vinyl. This basic walkthrough is designed to start ripping LP records as quickly as possible, yet producing quality results as can be heard in the downloadable recording.
Amarra Vinyl

As usual, the first task is to set the Audio Device to be used. In this case, the Lynx Hilo for both A/D D/A duties:

This means that the tube phono preamp is used for RIAA equalization.
Next, launch Amarra Vinyl:

Click on File Menu and select Audio I/O Preferences:

Select which Audio Device Amarra Vinyl is to use and save.
From the File menu, select New Sound File Preferences to open the dialog and set where Amarra Vinyl saves the files:

Note in the screen shot below, the LED indicator lights around the USB labels. By clicking on these lights will toggle the software’s state of whether ready to record or not. The green R means ready and the yellow A means armed.

Click on the big Rec button and drop the needle. A quick check of the recording level would be to find the loudest passage on the record and adjust the recording level as required. -3dBFS is a good peak level.
At the end of the record, click stop, and lift the needle. Amarra Vinyl will automatically render the waveform display. Flip the record, start the recording, drop the needle again.
Once the recording is complete, I played it back to see how it turned out:

Next task is to split the tracks. In Amarra Vinyl, this is called Mark Tracks. Place the play head cursor where the track is to start, and from the Mark menu, select start track. Advance the waveform display until it is in-between tracks. Then select End Track from the Start Menu:

Here I have marked the 2nd track and entered in the name of the track, Hard Headed Woman. Continue this way using the zoom and mark tools, until all tracks are marked and labeled.
At this stage, one might invoke the excellent editing tools to DeClick and DeCrackle the record. (DeClick and DeCrackle are the same products used in Sonic Studio’s own Grammy®, Emmy® and Oscar® award winning NoNoise professional software. - Editor). In my case, as this was a brand new LP record, and the 2nd time it was played, there are no clicks and very little surface noise, so I left the recording as is. However, it is worth perusing the help file to see the various ways to edit the digital audio, including a fully customizable fader tool.
Click on the Export button, which will bring up a dialog to set the location of the export folder to contain the exported files:

Once a location has been chosen, then click on the export button:

How does it sound?
Here is the first 65 seconds of Wild World: Amarra Vinyl Wild World 24/192 75MB ![]()
Hear any differences between this, Pure Vinyl, and HDTracks versions?
Amarra vinyl comes with an excellent 150 page manual that gives away some idea as to the number of features this product has. Also excellent was the tutorial I received, that comes with the software license, and ongoing support was fast and friendly.
Amarra vinyl has iTunes integration and may other features. However, the purpose of this basic walkthrough it to get going on ripping vinyl LP records to high resolution files as quickly as possible and that is repeatable.
Vinyl Studio

Launching Vinyl Studio brings up the main screen.
Click on Change Playback Options:

This allows one to choose playback device, and through the sound dialog, also choose input device.
Once the dialogs are closed, from the main screen, click on Recording Options:

I selected FLAC file format and clicking on FLAC file options:

Closing the dialogs returns to the main screen. Click on Check Level:

Find the loudest passage on the record and adjust the recording level if required or possible.
Close the Check Level dialog and click on Record which brings up the Ready to record dialog box:

Clicking on continue prompts to lower the needle on the record:

Now recording:

Once the record reaches the end of side one, lift the needle, and Vinyl Studio will pause and prompt with the Recording complete dialog box:

Repeat the process for side 2. Now ready to split tracks:

Using start and end markers, and adding track title, one can zip through splitting the tracks until completed:

Click Save Tracks tab:

Note while the Save corrected Audio was checked, none of the audio was corrected from the Cleanup Audio section. Also note iTunes integration. Click on Save:

How does it sound?
Here is the first 65 seconds: Vinyl Studio Wild World 24/192 75MB ![]()
Now that all track versions are available, it will be interesting if folks hear any differences between versions, especially compared to the HDTracks version.
Vinyl Studio’s help system is integrated right into the application. Balloon help appears while hovering over any control. Wizard like guidance is supplied at each step along the way. And the tabbed screens model the workflow. All of which makes the software easy to use.
I downloaded Vinyl Studio and in demo mode, which allows for 5 recordings to be made. I did not contact support or visit the forum.
Conclusion
This step by step walkthrough was designed to be a quick start guide for three popular vinyl recording software applications. The steps and screen shots were optimized to provide the shortest path to ripping audiophile vinyl to high resolution digital files on the Mac.
Each vinyl recording application has its own feature set. Depending on your vinyl recording requirements, at least one, if not more, should be able to meet your requirements.
For example, if RIAA equalization in software is important to you, then Pure Vinyl does an excellent job of this. If a complete editing suite is required, then perhaps Amarra Vinyl would be the choice. Or if a wizard like, “prompt as you go workflow” is your thing, then Vinyl Studio may get the nod. To qualify, these are my impressions using the software for a limited time.
The point is not one software is best. It depends on each person’s vinyl recording requirements.
With respect to which one sounds best. Everyone has access to the files to download and listen. :-) All three produce high quality recordings as evidenced by downloading the supplied files and listening on your own system. Quite frankly, I find it a bit amazing how close the vinyl recordings sound compared to the digital version from HDTracks.
Speaking of which, in the vinyl to digital guide for Windows ![]() , there is a section near the end in which the vinyl version and a CD ripped version of the same master are compared. So far no-one has come forward to claim if the comparison track starts with the vinyl rip or CD rip.
, there is a section near the end in which the vinyl version and a CD ripped version of the same master are compared. So far no-one has come forward to claim if the comparison track starts with the vinyl rip or CD rip.
Happy Listening!
Mitch
![]()
About the author
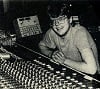
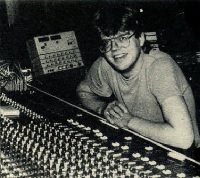 Mitch “Mitchco” Barnett
I love music and audio. I grew up with music around me as my Mom was a piano player (swing) and my Dad was an audiophile (jazz). At that time Heathkit was big and my Dad and I built several of their audio kits. Electronics was my first career and my hobby was building speakers, amps, preamps, etc., and I still DIY today ![]() . I also mixed live sound for a variety of bands, which led to an opportunity to work full-time in a 24 track recording studio. Over 10 years, I recorded, mixed, and sometimes produced
. I also mixed live sound for a variety of bands, which led to an opportunity to work full-time in a 24 track recording studio. Over 10 years, I recorded, mixed, and sometimes produced ![]() over 30 albums, 100 jingles, and several audio for video post productions in a number of recording studios in Western Canada. This was during a time when analog was going digital and I worked in the first 48 track all digital studio in Canada. Along the way, I partnered with some like-minded audiophile friends, and opened up an acoustic consulting and manufacturing company. I purchased a TEF acoustics analysis computer
over 30 albums, 100 jingles, and several audio for video post productions in a number of recording studios in Western Canada. This was during a time when analog was going digital and I worked in the first 48 track all digital studio in Canada. Along the way, I partnered with some like-minded audiophile friends, and opened up an acoustic consulting and manufacturing company. I purchased a TEF acoustics analysis computer ![]() which was a revolution in acoustic measuring as it was the first time sound could be measured in 3 dimensions. My interest in software development drove me back to University and I have been designing and developing software
which was a revolution in acoustic measuring as it was the first time sound could be measured in 3 dimensions. My interest in software development drove me back to University and I have been designing and developing software ![]() ever since.
ever since.
![]()
![]()
![]()


Recommended Comments
Create an account or sign in to comment
You need to be a member in order to leave a comment
Create an account
Sign up for a new account in our community. It's easy!
Register a new accountSign in
Already have an account? Sign in here.
Sign In Now