


Entry posted by wgscott
<p><a href="
Before you Start ...
Take a look at the well-hidden Computer Audiophile Academy: Basics
Introduction
There is a lot of mythology surrounding computer audio. This is too bad, because it is very simple to do. Take a look around any community college campus; almost every student is using computer audio without any fanfare, either directly via their iPhone (or iPod), via their computer, or via some sort of streaming service to an iPhone or computer. They don't really have to do anything in terms of preparation.
If you want to use your Apple computer to play music out of its tiny tinny little speakers (which on my iMac actually sound fairly decent), or via your headphones, all you have to do is fire up iTunes. If you have a cable with a minijack at one end and RCA jacks at the other, you can do the same thing with your home stereo.
Everything else is simply a refinement of the same procedure. One improvement in terms of electrical noise and possibly inherent sound quality is to use an external DAC (digital analogue converter), which you can connect to via USB, via optical (most Apple computers have a mini-jack that doubles as optical out), HDMI, or via USB/coax converter.
How to set up OS X to work with your external DAC or AVR receiver
If you have a stand-alone external DAC or DAC that is part of an integrated stereo system, chances are that it will use USB input, and/or optical and/or coax digital inputs, whereas if your DAC is part of an AVR, it most likely will offer HDMI and/or optical and/or coax digital inputs. Whichever is the case, the setup procedure is basically the same. What they all have in common is that you select the output device using a program located in the Utilities folder of the Applications folder on the main systems drive. The name of the program is called Audio MIDI Setup. You can open it quickly just by typing "Audio MIDI Setup" in Spotlight. It might be a good idea to keep it available in your Dock for future use.
Note: You (probably) don't need a "Driver"
Unless you are using an unusual interface or DAC, it is very unlikely that you will need to install any software at all to use it. If you are shopping for DACS or USB converters, place a high priority on those that don't require software drivers, which can cause huge headaches when the manufacturer doesn't keep up with operating system upgrades.
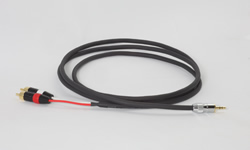
Note: You don't need an expensive cable.
<p><a href="
If you are spending more than $10 or $20 on a digital cable, you are paying for branding, jewelry or bragging rights. The differences you hear almost certainly will disappear when you close your eyes. Any competently manufactured cable will be good enough (eg: Bluejeans Cable, Monoprice, etc.) If you do decide to blow a wad of cash on a digital cable, at least become familiar with what a non-designer cable sounds like first, so you can compare. Do a double-blind test. Ask for objective measurements. Anyone who really makes something superior should be more than happy to prove it to you on your terms, not theirs.
a. If you have a USB DAC or USB coax converter or other USB bridge
<p><a href="
Select the name of your USB device, and set it as the default audio output. If there is an option for bit depth settings, set it to 24 bit (or higher if your DAC will allow it). Set the sampling frequency to the highest value your DAC allows (or highest in your audio file collection). If you have only mp3, AAC, or CD rips, 44,100 is all you need. If you set it higher (or in general to a different value), the system will resample your music.
b. If you have an HDMI receiver or integrated amp
<p><a href="
If you instead have an HDMI device, and your computer (mac mini or macbook pro) has an HDMI output, you can instead use this. If there is an option for bit depth settings, set it to 24 bit (or higher if your DAC will allow it). Set the sampling frequency to the highest value your DAC allows (or highest in your audio file collection). If you have only mp3, AAC, or CD rips, 44,100 is all you need, but you might be better off setting it to 48,000 Hz, for movie playback. If you set it higher (or in general to a different value), the system will resample your music.
c. If you are using optical output to your DAC or receiver
<p><a href="
If you are using the optical output (via the audio mini-jack, which doubles as an optical output), this will appear as "Build-in Output" or possibly "Digital Output" in the Audio MIDI Setup interface, which can be a bit confusing. The bit depth setting should be set to 24 bit. Set the sampling frequency to the highest value your DAC allows (or highest in your audio file collection). In general, optical output with Mac OS X doesn't go above 96000 Hz. If you have only mp3, AAC, or CD rips, 44,100 is all you need, but you might be better off setting it to 96,000 Hz anyway, depending on the DAC. The system will resample your music, but this process is transparent (at least I have never been able to hear differences).
How to maximize playback quality
a. Deactivate iTunes sound effects: a good idea
Assuming you are using iTunes, it is a good idea to turn off all of the playback "features" like fading and equalization. In general, these degrade sound quality. In the iTunes preferences, go to "Playback and uncheck every option:
<p><a href="
b. Deactivate System sound effects: A good idea
In System Preferences, de-activate all the sound effects:
<p><a href="
It is also a good idea to divert system alert sounds to some interface other than that which is connected to your $50,000 speakers. (I use "Soundflower", which is an emulated interface available in the form of free software.)
c. Notification Center: Do not disturb
Although I doubt it would damage the sound quality, the "Notification Center" can be incredibly annoying. You can set it to the "do not disturb" mode, or define your waking hours as the period you do not want to receive notifications. There is also a nuclear option for getting rid of it once and for all.
d. Spotlight: Leave it on, but ...
Some people suggest turning off Spotlight. I suggest you do not do this, because it will interfere with essential software updates. Instead, go to System Preferences, and configure Spotlight to avoid indexing your music library, and possibly the home directory for the account from which you play music. (In general, it is a good idea to have a separate account for this, if your computer is dedicated to audio and video functions.)
e. System files, startup items and system processes: Just don't fuck with them!
I personally recommend against deactivating system processes and startup (launchd) items. The claims of sonic improvement are subjective and controversial, and there is absolutely no compelling evidence that any of this improves sound quality. There are several shell scripts floating around that enable the user to blindly make changes; I strongly advise against their use, and I have to say I am really tired of people asking me to help them un-fuck their computers after using these. If you don't understand the syntax of any command that needs an administrative password to implement, please run away from it as fast as you can, and avoid a whole world of hurt. The launchd system that OS X now uses for startup is fundamentally different from what Windows uses or what other unix systems use. These items are designed to run only on demand for the most part, so they do not tax the system. Those who recommend disabling them simply do not understand how OS X works. Similarly, removing Applications and system files will do absolutely nothing other than free up disk space; it cannot affect the sound quality. Leave this stuff alone!
f. Hardware tweaks: Hang on to your wallet
Having 8 gig of memory may offer advantages. An internal SSD may also be advantageous. Although the case for it improving sound quality is subjective and controversial, it does give you a snappier and more responsive system. Remember that all discs, including SSDs, fail eventually, so be sure to back them up. You may eventually find that having an external drive for audio and video is a must. I personally favor the firewire bus-powered hard drives from Oyen Digital. Other hardware tweaks have been suggested, but I have never found a compelling case for any of them. Various companies that modify mac minis for playback come and go; Apple does not take kindly to this, and they seem to be very good at screwing up your computer and voiding the warranty. My advice is to stay away, and spend your hard-earned cash on some music instead.
g. Wireless vs. ethernet cable
There is no credible evidence that suggests using wifi on your music playing computer will in any way harm sound quality. If it is convenient to have a wire, go for it, but please do not think it is a requirement.
h. Third-party playback software
Some people use other player programs rather than, or parasitic upon, iTunes. This is by no means a necessity for high-quality audio playback. At the very least, become very familiar with iTunes, how it sounds, and its limitations, so if you decide to evaluate something that costs money, you can at least make an intelligent comparison.
<p><a href="


13 Comments
Recommended Comments